|
|
|
|
|
|
|
|
|
|
|
|
|
|
|
|
|
|
|
|
|
Sub breel1_timer |
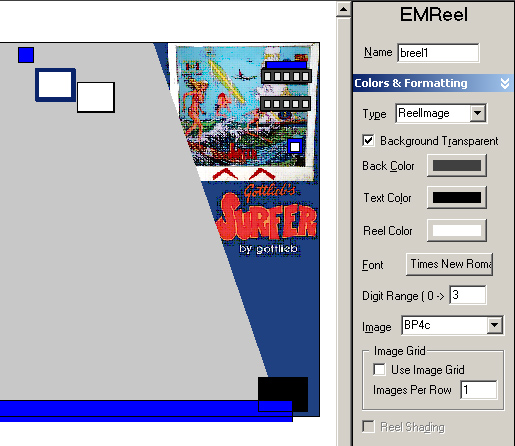
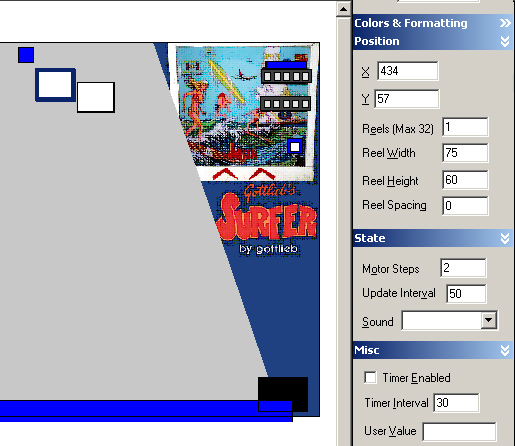
Create, size, and position the EMReels for both flippers the same way you did the reels for pop bumpers. You will create two timer routines to control the flippers. The main difference in the timer routine is the animation count can go forwards or backwards. The timer routines are tied into the flipper keycodes. When you press a flipper you want the flipper timer to be started and the flipper animation count increment to be 1. When you release the flipper you want to start the timer again, but change the animation count increment to -1 so it goes back down. When the flipper reaches the top or bottom you stop the timer. I found the timer interval of 10 to be about right to match flipper speed but yours may vary. I'm not going to explain this in greater detail because either you'll understand what I'm saying and know what to do or the examples wouldn't help you anyways. VP is a great tool for people with some graphics and programming skills, but making a nice animating bumper or flipper isn't as easy as dropping an image in the editor and cut and paste some code. It takes a lot of trial and error and tweaking to get it to look real. I hope this gives you some idea how its done! |
Reels don't work well when placed next to 3D objects on the table. For example putting an animated pop bumper reel next
to a light may cause a dark ring around the light, even though the area in the pop bumper is transparent. Another problem
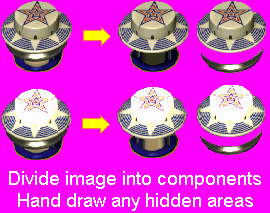
is overlapping reels/decals. As long as the areas overlapping are transparent there is no problem. But if you have one bumper
obscured by another, you will find it easier to cut the obstructed bumper into separate reels. For example if the visible
part of the obstructed bumper is an L shape, cut the images into a rectangle and a square and make 2 reels. You will have
to time them together in the Hit and Timer routines. |
The reel control has some limitations. For one you can't enter more than 200 frames (0-199) in the control, but for
all practical purposes the real limit is 192 (0-191) because for some reason it doesn't display the ones after 191
properly. |
I hope this helps you get started making animated reels. The same principles apply to animated lights, rollovers, targets, you name it. Round targets look great when they bounce when hit. Drop targets look real when they move back and fall down instead of disappear. Lights that are off, dim, lit or change colors can also be made with reels. |
 Gottlieb's Reel Animation Guide
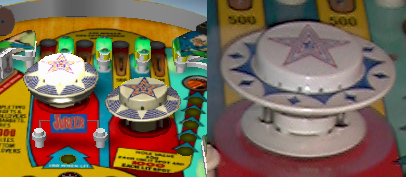

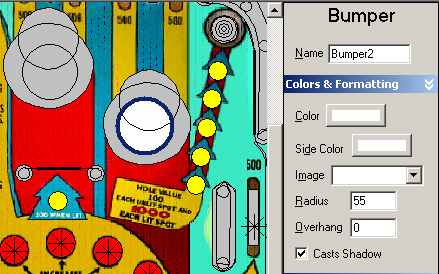
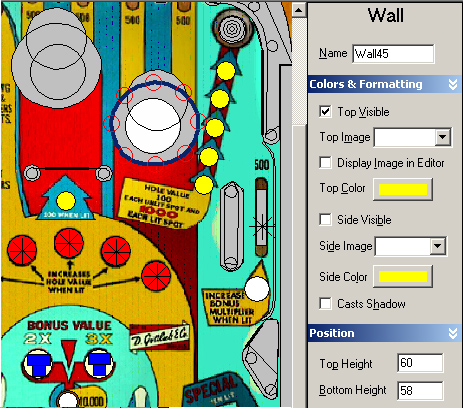
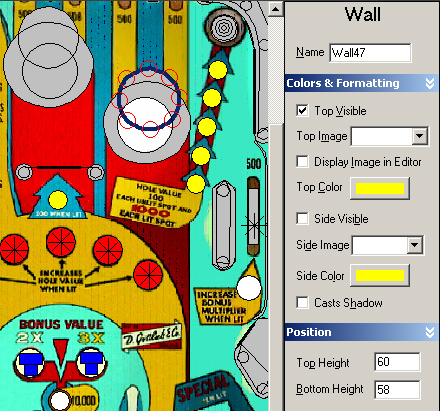
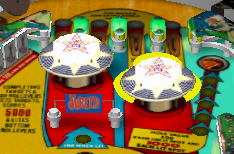 Here is what it looks like when you play the
table. You want to adjust the size and shape of the walls so they exactly
hide the reel image, like the bumper on the left.
Here is what it looks like when you play the
table. You want to adjust the size and shape of the walls so they exactly
hide the reel image, like the bumper on the left.